This tutorial will show you how to add arrows and annotations using Procreate to allow you to create your own unique graphics for your ASL resources. If you are already familiar with Procreate or use other graphics packages, do feel free to ignore this and do your own thing 🙂
Why Add Your Own Arrows and Notations to ASL Clipart?
While, of course, you can purchase ready-notated ASL clipart from here and other sources, however, it’s really simple to add your own arrows and notations, and by doing this, you can create graphics which accurately reflect your own teaching method. There maybe graphics where you want to highlight a certain gesture or use notations to reinforce a certain sign.
Another good reason for adding your own arrows and notations is you can create graphics which closely match your brand and style. This is particularly important when you are creating resources to sell at Teachers Pay Teachers and other venues, as it helps to create graphics which are unique to you and your brand. You may want to use arrows with the ASL clipart which are in a different color to the standard black or white, or perhaps create different styles of notation.
If you want to add your own arrows and notations to ASL clipart, you’ll find it’s easy to do using any drawing or graphics app. In this tutorial we’re going to use Procreate, however the principle will be much the same with whichever app you use.
In this tutorial I am adding an arrow to the clipart, however the principle is the same whether you are adding arrows or annotations.
How to Add Arrows to ASL Clipart Using Procreate
The first thing to do is to get the ASL clipart onto your iPad. If you already know how to do this, jump straight to the how to add annotations section.
There are many ways to do open files in Procreate. Transferring files using a Cloud service such as iCloud Drive, Dropbox or Google Drive is simple and straight forward. Just add the files to your cloud service and then access them from your iPad. Another quick way, if you just have a few images, is to email them to yourself.
To open the images in Procreate, simply download the images to the photo file on your iPad or you can open the file directly from iCloud Drive. Here are two ways to do it below:
Open File From iCloud Drive
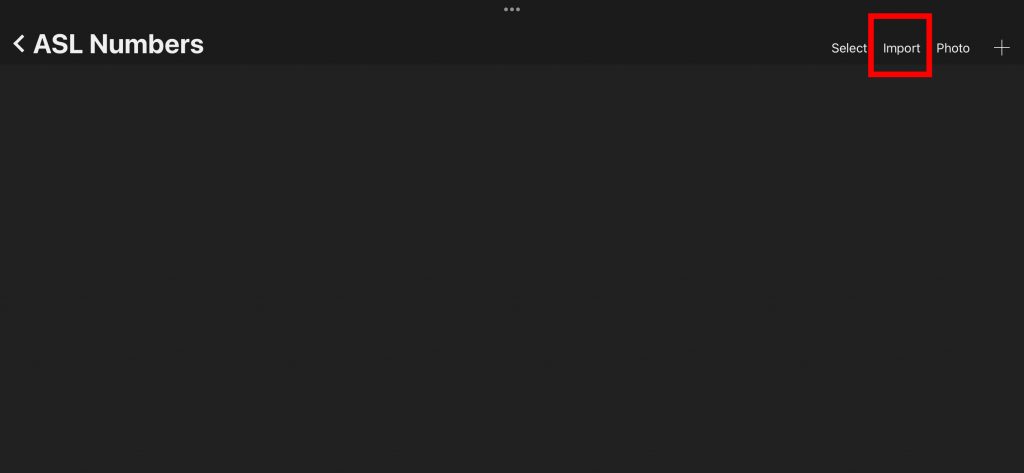
Open Procreate and use the ‘Import’ function to import a file from iCloud Drive to Procreate to work on.
Insert Image
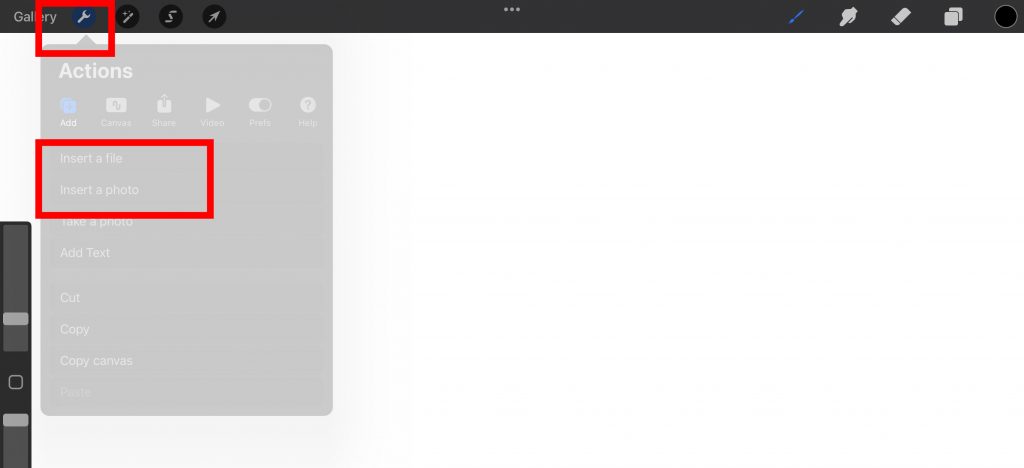
One other way to do this is to insert an image into an already open document. To do this, create the document the correct size you require and then select ‘actions’ and choose ‘insert file’ or ‘insert photo’.
‘Open In’
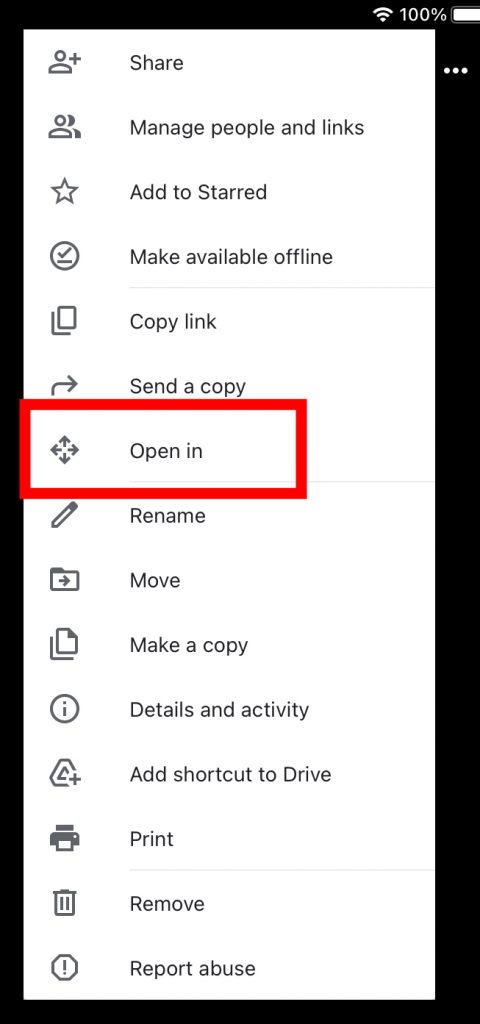
And another way to do this is to open the image directly from Google Drive into Procreate using the ‘Open In’ option.
Add Arrows and Annotations
Adjust the Size of the Canvas
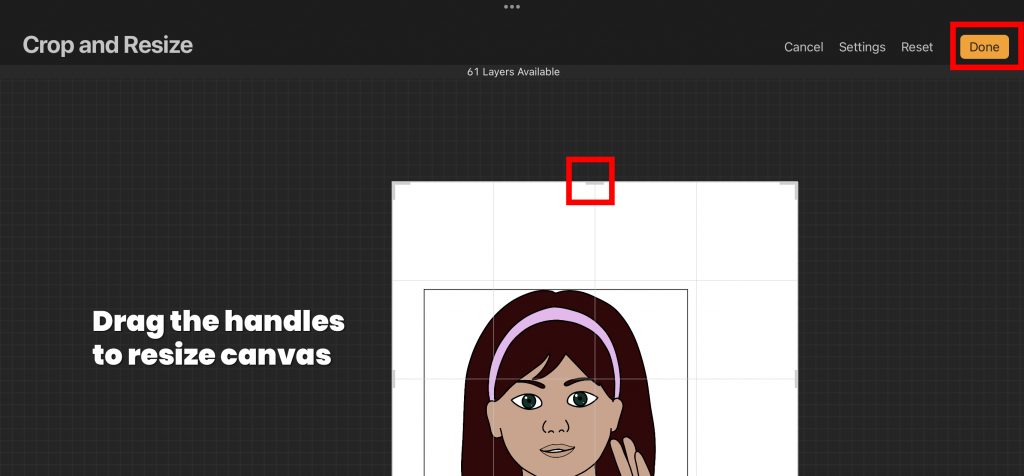
You may need to adjust the size of the canvas. For example, you may want to add additional space to the size to add notations or arrows. To do this, click on the wrench (top left) and select ‘Canvas’ and then ‘Crop and Resize’. Drag the handles to resize the canvas to give you the space you require. Note: You could also reduce the size of the graphic to give you space, however by making the canvas larger, you retain the full size of the image meaning you can use it for posters as well as smaller items.
Choose Brush
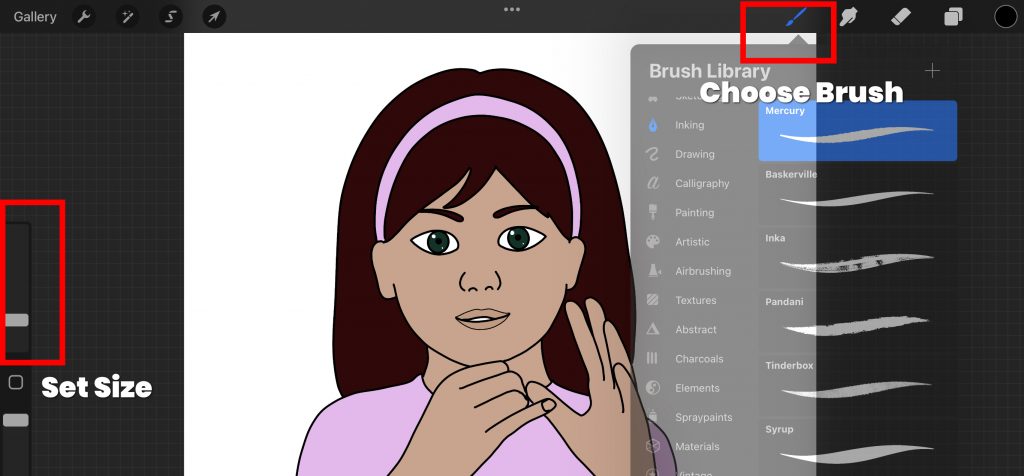
Choose which brush you want to use to draw the arrows on your ASL clipart. You will see there are a variety of brushes available in Procreate, so it’s best to try different ones to see the different effects and which work best for you and your students to read. You can adjust the size using the slider on the left of the page.
Add a New Layer
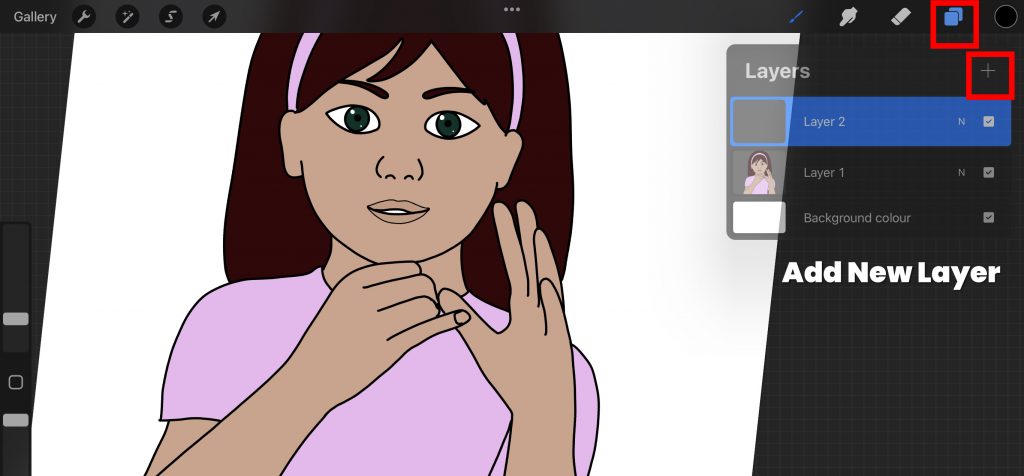
Add a new layer to your document. This is important because it means you can draw over the image without effecting it. If you don’t add a new layer and draw an arrow directly onto the graphic, and then try to erase it, you will find you erase part of the graphic too.
Draw an Arrow!
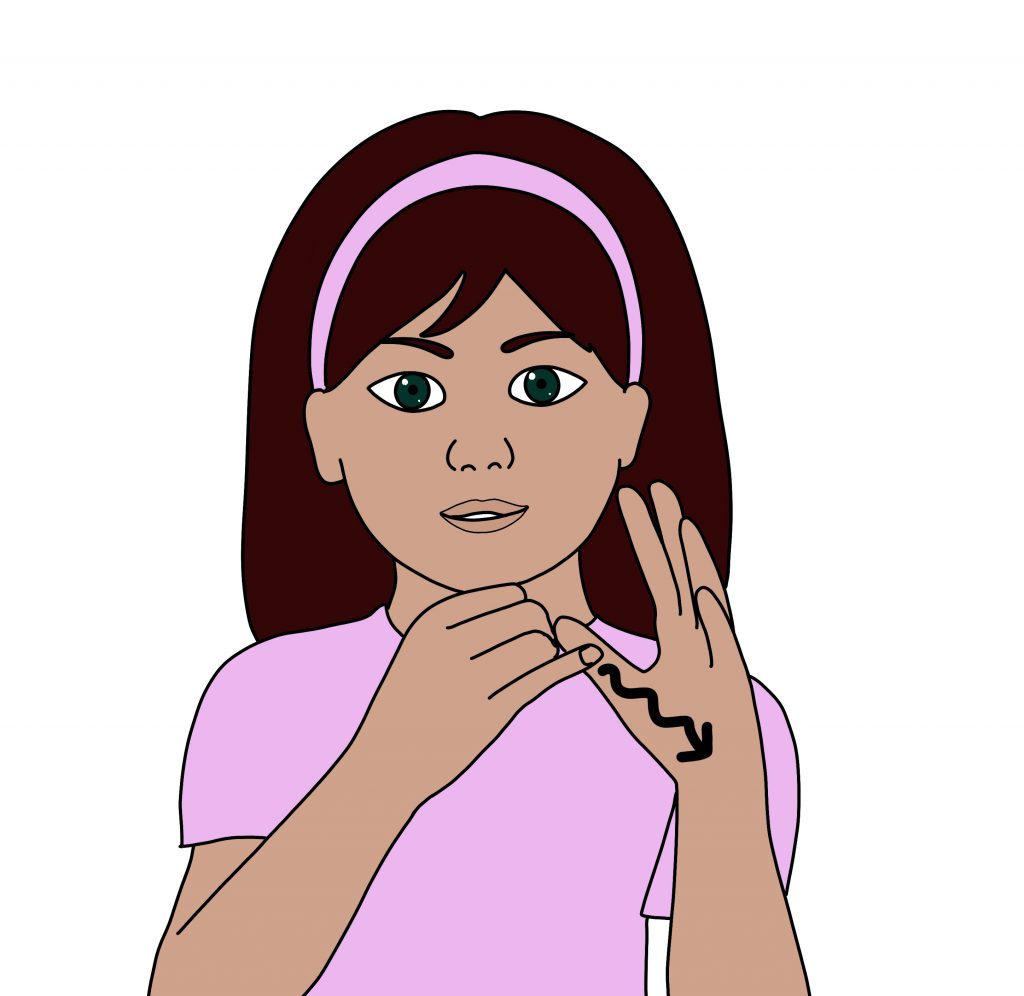
Draw an arrow which reflects the movement you want to indicate. When you are happy you can now export the file (using the Actions (wrench icon, top left) and select ‘Share’ to save the image to your camera roll or files).
However, we can make the arrows stand out more or add emphasis, buy adding effects to the arrow. It’s important to note that arrows and annotations are here to help the student understand the movement, and not for decoration which may detract from the message of the image.
Add ‘Dropped Shadow’
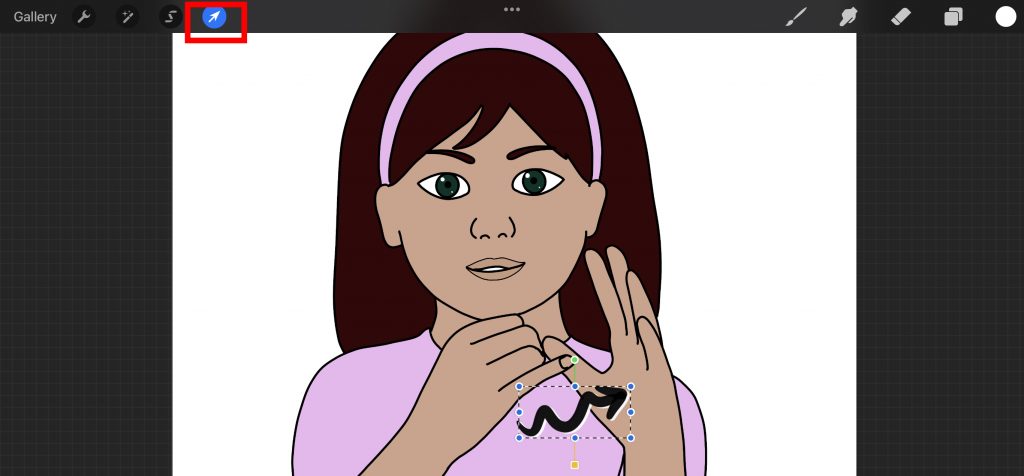
One effect which is easy to achieve is a dropped shadow type of effect. Note: Procreate doesn’t have built in features such as outlines of strokes and shadows, so we have to be creative! To add a shadow effect, simply duplicate the arrow layer (to do this, tap on the layer to ensure it is active and then swipe to the left to reveal more options and select ‘duplicate’). Change the color of one of the arrows (choose a color from the color pallet and then drag the color icon onto the arrow). Tap on the ‘select’ icon (arrow, top left) and you will see a dotted line around the arrow. Now move this slightly so it is off center from the arrow above as in the image.
Add an Outline
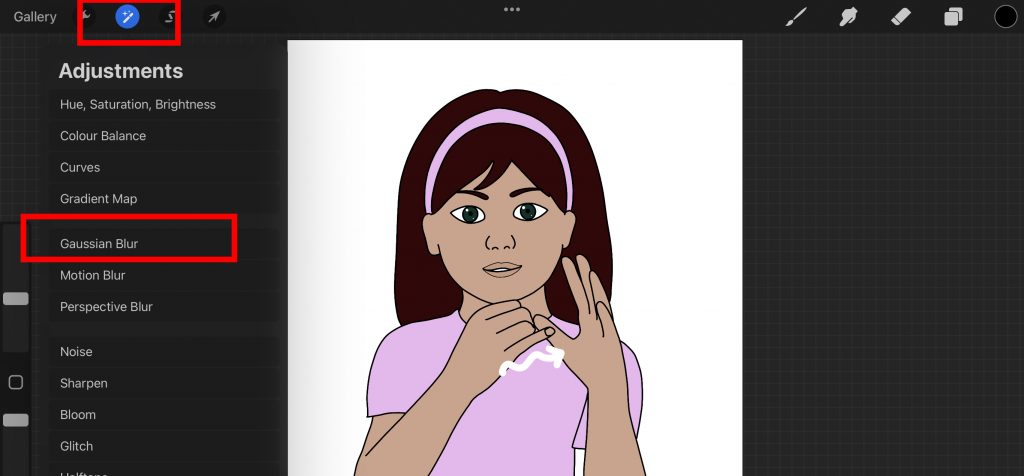
There isn’t a straightforward way to do this in Procreate, however this workaround is quick and easy to do, and works well for this purpose. We will use the Gaussian Blur tool for this. You will find this under the Adjustments panel. Follow the same steps as above to create a duplicate arrow, recolor it, but this time don’t move it – hide the top arrow so you can see what is happening with the layer we are working on. Tap on Gaussian blur tool and blur the edges. I have used 10% in this example, however experiment and see which works best for you.
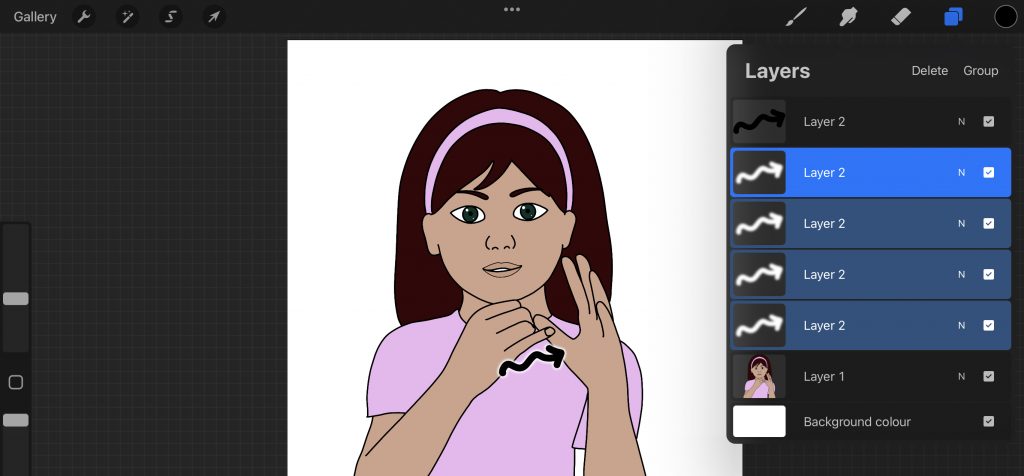
The Gaussian Blur tool makes a light transparent edge to the arrow which extends beyond the original shape. However, when you turn the top arrow layer back on again, you will see that the blur is so transparent, it is difficult to see. This is where the workaround comes in! Duplicate the blurred arrow layer several times. This makes the blur more and more opaque each time you duplicate it. Tip: if you highlight several rows, you can ‘pinch’ them together so they are merged, and then duplicate this.
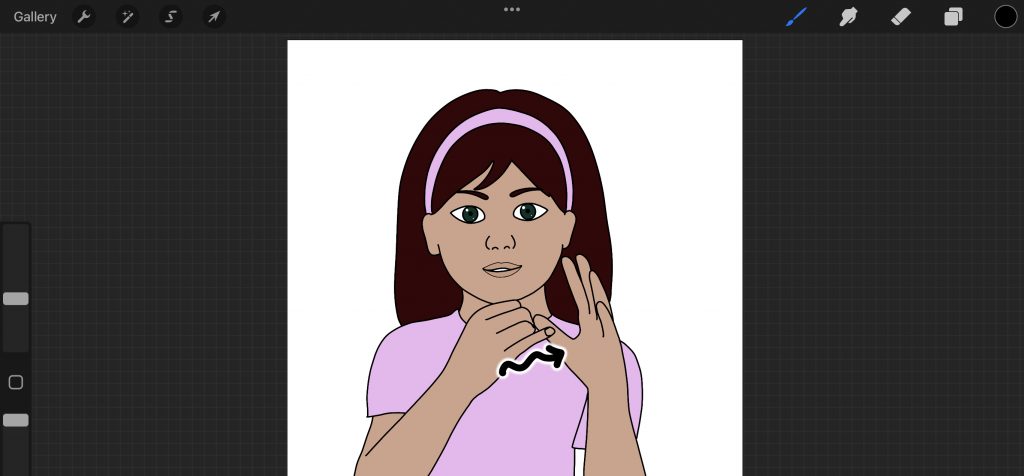
When you are happy with the look, just share the file to your camera roll or files.
How to Add an Arrow that Appears to Go Through the Body
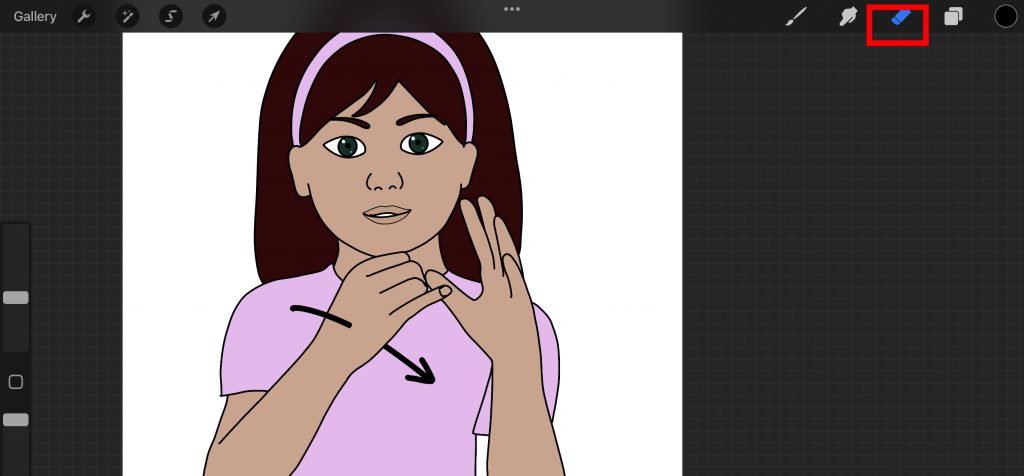
Do highlight key movements we can also draw an arrow so it appears to be coming through the hand or other part of the body. This is straightforward to do, just draw an arrow as you would normally and the use the eraser tool (top right) to erase part of the arrow as I have done in this image.
Tips for Adding Arrows and Notations to ASL Clipart
Here are some tips to help you add arrows and notations to your ASL clipart:
- Think about how you teach signs and add arrows which closely reflect this. You may find standing in front of a mirror helps when adding arrows.
- Written descriptions can also be useful to support the learning of a sign, particularly when teaching adult learners or if someone is learning remotely.
- Use colors which stand out for your arrows and annotations, but not so much that they detract the eye from the graphic
- Get students to draw their own arrows! This is a great way to reinforce learning.
I hope this has been useful and I will add more tutorials showing how to add arrows and annotation to your clipart using different apps and programs later.